Saturday 17 August 2013

Even smaller bits and some paint

Today the rain poured down and the wind blew so I hid in the garage and made some more progress. Looking at the cab I realised that it wasn't entirely square on the roof but I decided that it was within tolerance and the odds on me getting it better rather than just different were pretty slim so I thought quitting while you are ahead was a worthwhile strategy.

The next bits to add were the hand rails on the cab. These are the ones which come from cab roof to footplate at the rear and the ones on the leading edge of the cab. To put the latter ones in place I realised that the rounded cut outs in the cab sides needed to have a strip of brass added. I'm not explaining very well but its obvious in the pictures.


Without

With

I know I've banged on about this being fiddly but blimey this was tricky. Springy bent brass Vs me and the soldering iron. Anyway, when they were attached and I'd finally finished throwing other very small things on the floor and spending ages on my knees looking for them and eventually soldering them on I was quite pleased. 

I glued the hand brake and reversing lever onto the firebox and fashioned and glued a regulator on. Looking pretty good. There are a couple of bits to still add like the under footplate brake linkage and the reversing lever thing above the footplate but it isn't far off. I ordered a couple of whistles and some smokebox door handles yesterday so they should arrive on Monday with luck. 

Paint, I thought. Paint next. Hey ho. The cab and the tank/boiler are still separate so I gave those a coat of Halfords primer. It seems to show up any problems which otherwise remain invisible.


In this instance the boiler/tank bit seemed fine but the cab still need some bits sorting out. Nothing major though. A couple of spots of filler where the sides and front meet but mostly ok.


Once the primer had dried I did a bit of detail work with black and the red. I also used my metal ink pens to fill out some cab detail.


Friday 16 August 2013

Cab 2, going slightly mad

After a trip to the beach with the assembled relatives I skulked off to the garage to progress me little blue engine. I wasn't happy with the cab as I'd managed to get solder all over it and so, following Steve's advice I gassed up my soldering iron which doubles as a blow torch and attacked the second set of etches for the cab. I decided that I would try a different approach to the construction this time so I laminated each part first and then assembled them rather than follow the instructions and try to laminate the finished inner cab. I used solder paste and then heated the lot up with the gas jet. First shot I just did it on my work bench... after I put out the little fire I got a brick from outside and did the rest on that: better. Not sure doing it in this order was a good plan but after a lot of buggering about I ended up with a better version of the cab. Bit scary waving a bunsen burner about the place but no harm done, if you don't count the burnt patch on my desk.


The cab and the tank aren't attached to each other or the footplate but it's all looking pretty good to me. Next is detailing and then a good clean up of all the bits before the spoiling with paint phase. I'll pop over to Blodge next week if I get a chance and take some pictures so I get the details right. The real thing has vacuum pipes but I'm not sure whether to add these or leave them off.

The most obvious details I need to fabricate are the brass lubricators which are on the front of the tanks.


Thursday 15 August 2013

One step forward...

I had a forced day off yesterday because the lovely people at Scottish Power decided that we needed another day without lectric. All fine but I'd forgotten and so left everything in the garage including my reading/modelling specs; electric garage doors are very Thunderbirds except when theres no electricity.

Anyway today there was power but there was also an invasion of relatives... for a whole week!!!!!!!!

Just to step back to yesterday evening for a minute; I had a very pleasant time with Steve from Narrow Planet. We chewed the fat about little trains and modelling techniques old and new and had a very interesting time. He also brought with him a couple of sets of his lovely name plates. One for my somewhat stalled Beddgelert and the other for Nancy.

Today, despite the invasion I managed to sneak off to the garage for a while and added the plates to Nancy which finished her off beautifully. I'll sort out some pictures soon.

I also spent some time fiddling with the chassis for Britomart and I'd say it was 90% sorted. It runs very nicely and with some running in will be lovely. It chugged up and down the big hill with a couple of bogie coaches and some slate wagons with no bother. I did some work on the body too which was partly successful and partly not. I had a rummage and found and attached some couplers and I also added the handrails which for once in my life, are level with each other and look the part. I've also drilled out the chimney casting and attached it. One thing which the kit lacks is the wooden tool box which sits on the handrails on top of the tank.However, I've found a whitemetal casting in the box of bits which is pretty much the right size.

The cab, which I wasn't happy with anyway has bitten the dust. I tried to improve the soldering and it all just fell to bits. Its not the fault of the kit its my lack of experience with this type of construction. Fortunately, Brian sent me two sets of cab etch so I can start again. Talking to Steve about it has convinced me that the laminating needs to be done in a different way. I have some Carrs solder paste and a gas soldering iron which can also work as a small blow torch so I'll get some gas tomorrow and have another go. I really want to do this kit justice. Fingers crossed.

Tuesday 13 August 2013

Movement

I've spent the last couple of days in the garage sniffing solder and burning my finger tips. In between doing these things I've been getting on with Britomart. I won't lie and say it has all gone swimmingly because this is the fiddliest, tiniest thing I've ever made but with persistance I've made some progress.


Footplate, buffer beams and frames soldered up

One of the trickiest bits was making up the cylinder assemblies. The instructions say that the bit that slides into the cylinder should be superglued but I found a bit of brass rod the right size and soldered that on instead. After much swearing and re soldering I got both the slide and the con rods to hinge as they should.

Side rods on and cylinders not fixed in place

All the valve gear attached, not quite running


The next finger tip burning phase was to make the cab up. It consists of a set of inner etches and then outer ones with the detail embossed on them. The inner set went together pretty well but I found attaching the outer skin very difficult, I think this was mainly down to my lack of skill. I have made a reasonable stab at it but Brian has predicted that I might mess this up so has given me a second set of etches for the cab so I may have a second stab at this. 

While I was making up the cab I was fettling the chassis and I've got it to run... not as well as I know it can but better than I expected. I will make it perfect, hopefully.

The boiler/tank casting is lovely and needed very little cleaning up. So far I've attached the safety valves, tank filler and smokebox door. It catches the look of the real thing very well. I've seen it haul a full WHR set out of the carriage shed at Dinas with lots of chuffing. I need to get some detail pictures now and start adding the details. I've got handrails knobs and wire but one of the most obvious features are the lubricators on the front of the tanks, also the wooden tool box which sits in front of the cab.


Wednesday 7 August 2013

Soldering and a headache

I ran out of excuses and so I plugged the soldering iron in and gathered my tools about me... then I thought 'I'll get my eye in soldering by making up that little flat wagon that came with the crane I made last week.' So I did, it has made up into a very nice little wagon. A quick clean up and paint and it will be very nice. Then it was time for dinner; I got up to go indoors but in doing so I banged my head into the corner of the baseboard of St Ruth which is above my workbench. Ouch!

The new hole in my head

The corner of the baseboard that made the new hole

The wagon I'd just made
 
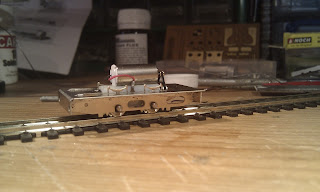
Anyhow, after I stopped bleeding and ate my dinner I went back to the garage and cautiously sat down to start work on Britomart. After peeling off the bit of my head which had adhered to the layout I read through the first page of instructions and set about making a powered chassis. So far so good. I now have a chassis which runs in both directions.
 
The first stage, attaching the contacts to the motor


The motor glued on and a running chassis

I decided that that was enough excitement for one evening but I couldn't resist getting the footplate and frames from their fret and resting the boiler casting on just to get a feel for what it will look like. Marvellous, having seen real quarry Hunslets in a similar state of undress I can attest that even like this it looks very real.

A taste of things to come
 

Monday 5 August 2013

No more excuses

 
All the bits are here, the work bench is clear. That's it, I'll have to start building. I only hope I can do justice to Brian's lovely looking kit. He has very kindly sent me a development kit to see if a numpty can put it together. If I can anyone can. Watch this space.

I didn't say what. Britomart - a specially adapted kit for our local loco. If all goes well I shall also fit the tea urn to the footplate which the prototype has. It is a copper sugar jar with a steam heated coil through it and is the most efficient kettle I've ever seen. Boston Lodge built Leary also has one.

The real thing in action last year - The driver is seated not a child


Saturday 3 August 2013

Cranes and clues

I spent yesterday evening making a pair of cranes. The overhead gantry has always been going to have a winch but somehow I never got round to it. So I stuck a couple of a lengths of rail to the top of the girders and contrived a sort of travelling winch bit out of a Minitrains skip chassis and some bits and bobs, it has a bit of chain wrapped round it. I gave it a squirt of grey primer and it looks OK. A bit of weathering and it will do the job nicely. Lucky that Daopl signal gantries have top edges which are N gauge.

The other crane is the wharfside one which looks like it has always been there. However, it hasn't. It is the crane part from a N Brass crane wagon. I'll make the wagon up as a flat. the crane is a whitemetal kit which went together very nicely and is just the right size.


I got something else in the post today... not much of a clue but now I've got all the bits for the next project which will occupy the work bench. Day off tomorrow so I hope to get time to start work...

Friday 2 August 2013

Coming soon...

So what is the mystery project which has caused me to clear my workbench?

Clues:1 - It is blue.
          2 - It is small.
          3 - I will have the first one.
          4 - You should be able to see the finished article in the goods shed at Dinas in September and purchase your very own one.

No more clues but a plug. Arnold Lane Wharf will be on show at the Welsh Highland Railway's annual 'do' in September. This year in addition to Garratts and all that on the big railway there will be an excellent selection of top notch NG layouts in attendance. Some will be in the goods shed and others will be in the loco shed. As soon as I have the details of all the layouts I'll post them, but I know that 'Bron Hebog' is coming. My little effort will be next to the F&WHR sales stand with examples of stuff available for sale on it. I shall be running round with the video camera most of the time but I hope to get a little time to play trains too.


I stole another light fitting from Underhill's lighting rig and fitted it to Arnold Lane so it now has very nearly enough lighting. I may go for one more fitting... Am I an addict?